 US Dollars
 Accessories
 Blue Clean
 Blue Legacy
 Pro Line
 Shop All


AR Blue Clean Pro, PRO600-WMK Cart & Wall Mount
Write a Review

Accessories
AR Blue Clean Pro, PRO600-WMK Cart & Wall Mount
- Brand:
- Accessories
- SKU:
- Pro600-WMK
- Width:
- 15.12 (in)
- Height:
- 15.00 (in)
- Depth:
- 12.00 (in)
- Availability:
- 3-5 Business Days
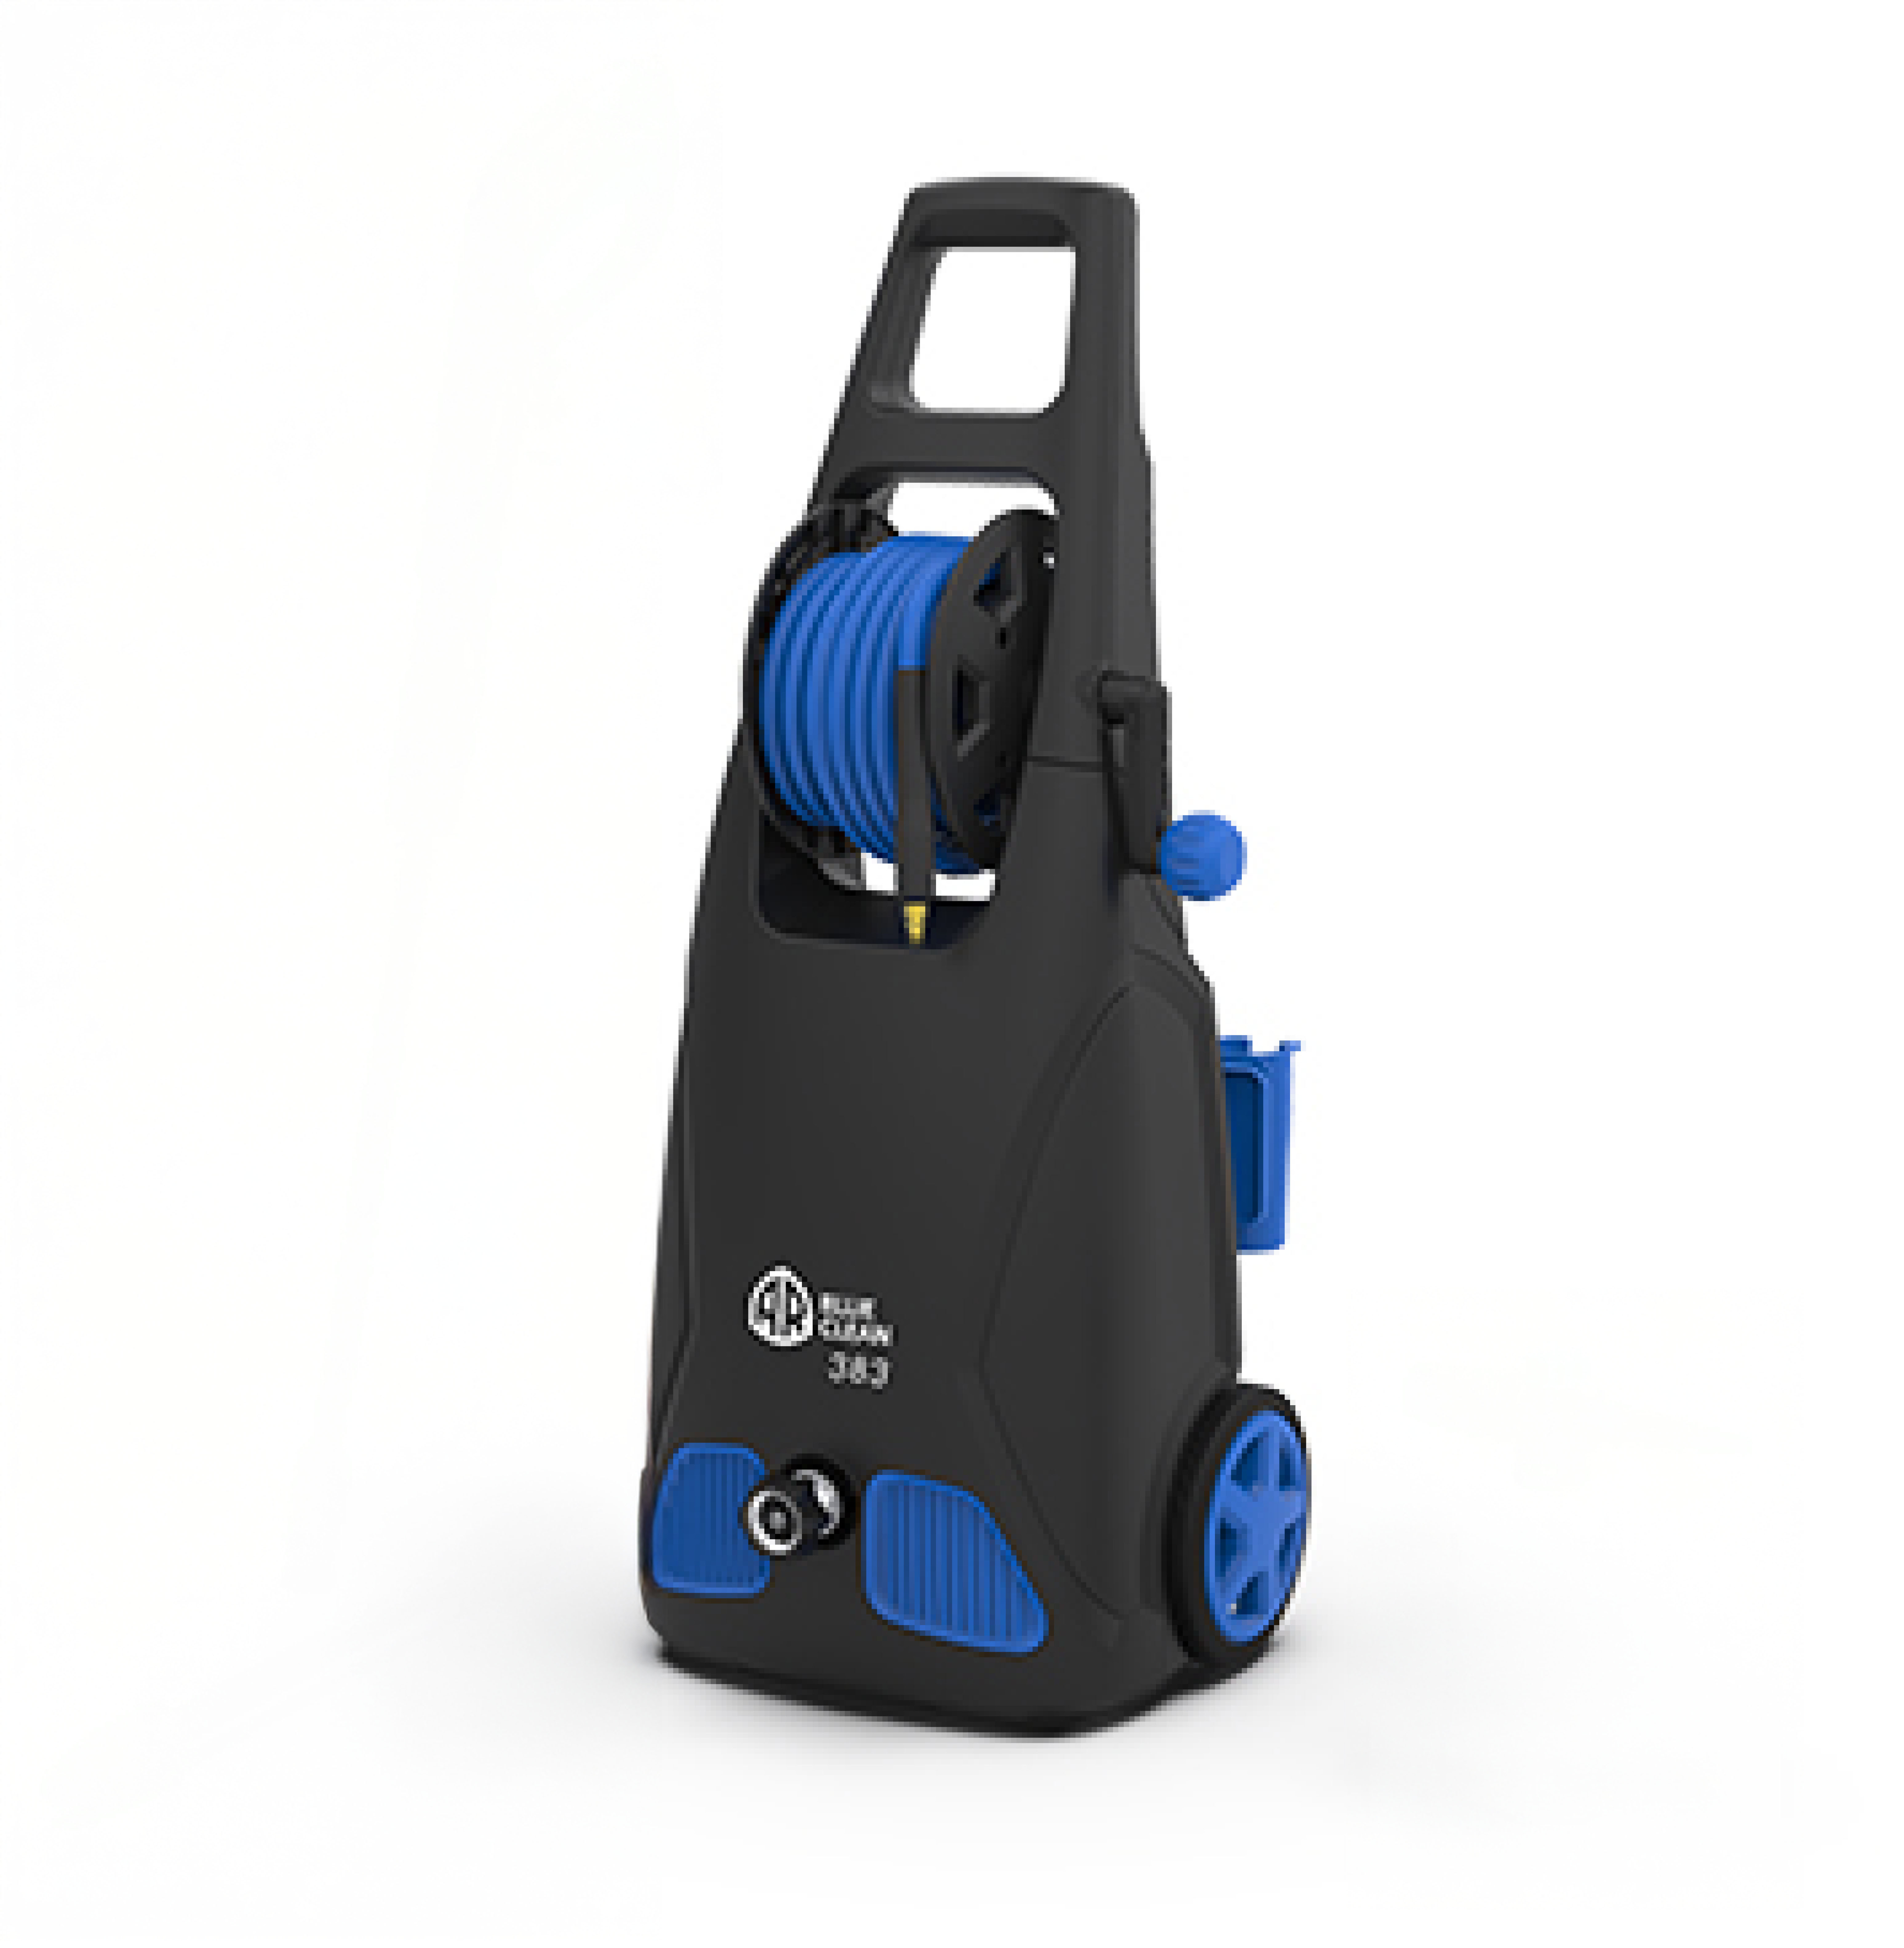
AR Blue Clean Pro, Pro600-WMK 4 Wheel Cart & Wall Mount Kit
The Pro600-WMK is built to be rugged, versatile, and mobile. Constructed from a powder coated, square, tubular frame the cart / mount features a removable storage bracket for extension cords or accessories, spacer rubber stop to assure a level mount, and 4 ball bearing swivel casters for ease of shop mobility. Above all, the cart features a precision bent steel mounting bracket so you can mount the unit on a wall, in a shop, or in your mobile detailing van. The bracket is useful for both securing the pressure washer unit in place as well as a mount. Get the best of both worlds with the Pro600-WMK, use your pressure washer on the go with the easy to move 4 wheeled cart, or mount it to the wall to save space.
Pro600-WMK Features:
- Powder coated tubular cart, made for durability to be taken anywhere for maximum versatility
- 2 in 1 Design: Easy mobility using the 4 wheeled cart, or mount the cart using the built in wall mount to save space
- Compatible Units: AR630, AR630TSS, AR630-Hot, AR630TSS-Hot
- Cart Includes: 4 ball bearing swivel caster wheels, wall mounting back plate
INSTALL INSTRUCTIONS:
AR630 Installation Instructions to cart
1. Align the Rail Pattern
- Your AR630 comes pre-installed with a pair of metal rails.
- Each rail has multiple holes. Remove the rails from the bottom of the AR630.
- Align one rail with the hole pattern on the Cart Base Plate.
- Mark the correct hole positions on the rail.
2. Adjust the Rail Position
- Reposition the rail so that it can be reattached to the AR630 and aligns with the holes on the Cart Base Plate.
- Once aligned, securely mount the rails back onto the AR630.
3. Remove Rubber Grommets
- Carefully remove the rubber grommets from the rails.
4. Mount the AR630 to the Cart
-
- Place the AR630 (with the adjusted rails) onto the cart.
- Align the mounting holes carefully.
- Tip: It may be easier to install the bolts if both the cart and the pressure washer are laid flat on a workbench—place the cart on its back and the washer on its side. Install a plug and remove the dip stick if using this method.
Wall Mounting Instructions
1. Measure Your Space
- Measure the wall area where you plan to mount the cart to ensure it fits properly.
- Pro Tip: Consider space for accessories, hose clearance, and ease of use to ensure there’s ample room around the unit.
2. Align, Level, and Secure the Wall Bracket
- Position the wall bracket at your desired location.
- Use a level to ensure it is straight.
- Important: The bracket must be mounted directly into wall studs to support the unit’s weight.
3. Mounting Options
-
- If your wall studs are not spaced at the standard 16 inches on center (OC):
- Option A: Install a solid mounting surface (e.g., a plywood backer board) across the studs, then bolt the bracket to that surface.
- Option B: Alternatively, you can frame the wall to create a solid structure that matches the bracket’s mounting requirements.
- If your wall studs are not spaced at the standard 16 inches on center (OC):
Manuals
Sorry, we couldn't find any manuals for this product at this time. Please check back later.
- Frame:
- Powder Coated Steel, Tubular
- Weight (lbs.):
- 11
- Assembled Dimensions:
- 12"D x 15-1/8"W x 15
- Wall Plate Dimensions:
- 17"L x 3-3/4"H
- Wall Plate Mounting Holes:
- 16" on Center, Width x 2-3/4" on Center Height
- Made in:
- USA
- Fitment:
- AR630, AR630TSS, AR630HOT, AR630TSS-HOT, AR610
0 Reviews Hide Reviews Show Reviews

Accessories
AR Blue Clean PW64511, Universal Pressure Washer Pump Saver
")
Accessories
AR Blue Clean PW909UFH-BLUE, 25' Uber-Flex Pressure Washer Hose Kit (1/4" x 25' Replacement/Extension Hose)

Pro Line
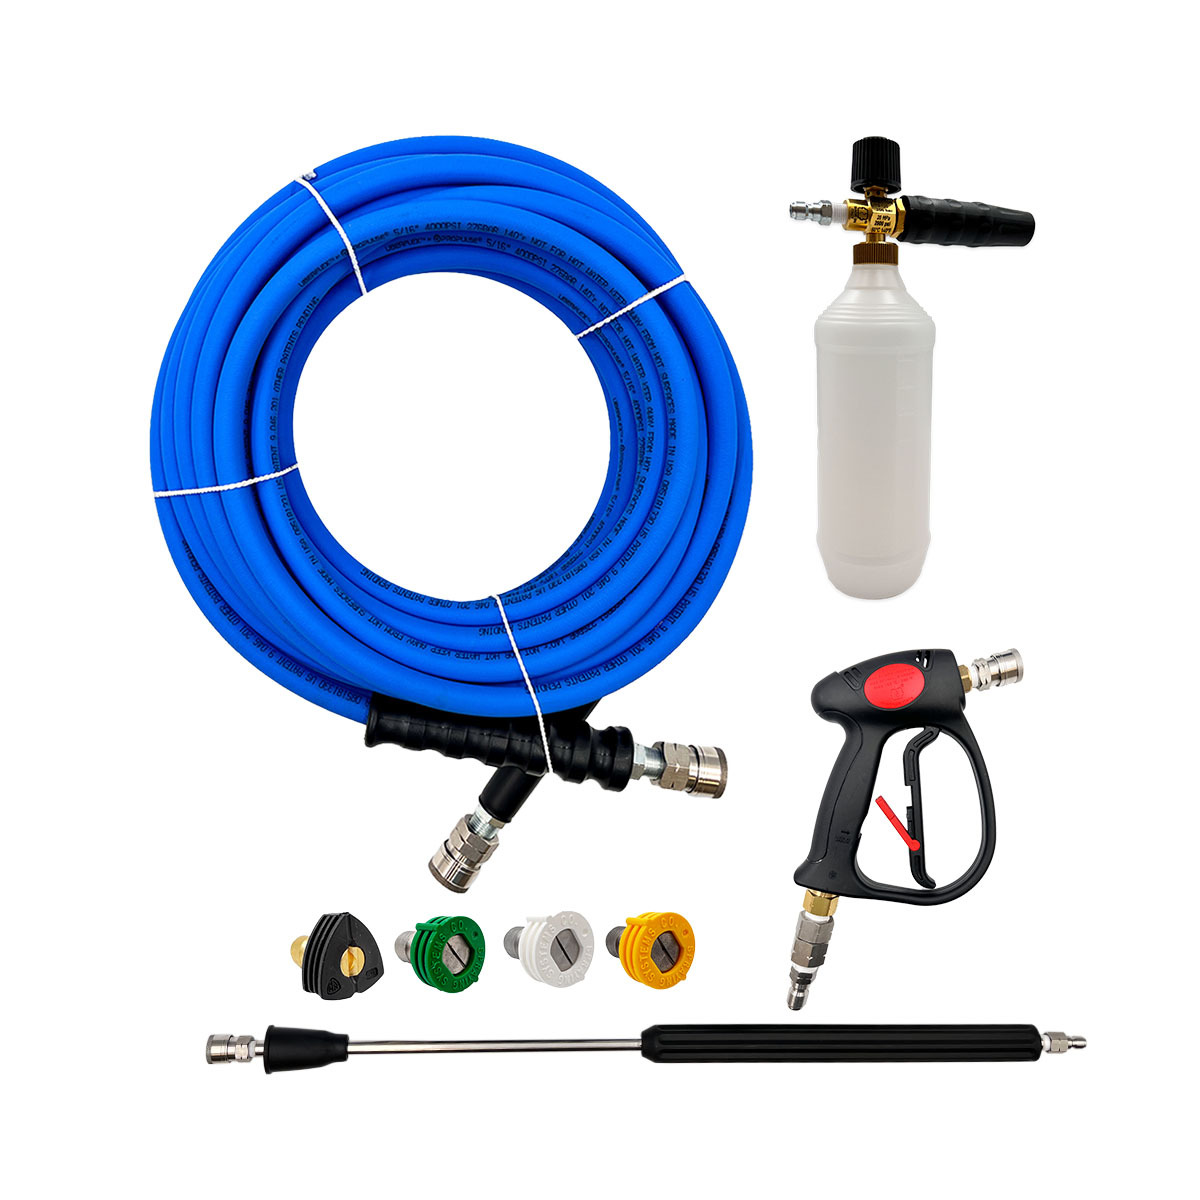
AR Blue Clean PRO-ACCK , AR PRO Series accessories Kit

Accessories
PF22, High Pressure Pro Foam Cannon

Pro Line
AR Blue Clean Pro, AR610, 1350 PSI, 1.9 gpm, 15 amp, Cold Water use, Electric Pressure washer

Pro Line
AR Blue Clean Pro, AR630TSS, 1900 PSI, 20 amp, 2.1 gpm, Total Stop, Cold Water use, Electric Pressure washer

Pro Line
AR Blue Clean Pro, AR630TSS-HOT, 1900 PSI, 2.1 gpm, 20 amp, Total Stop, Hot Water use, Electric Pressure washer

Blue Legacy